Digital Illustration with TEN HUNDRED (And Photoshop) |
Digital Illustration is something you can do with Photoshop. You can create a drawing or sketch on paper in real life and photograph your drawing. In photoshop you can color your artwork.
The Tutorial Series by TenHundered on YouTube is very well done and explains the process in detail. |
Step OneCreate your own drawing of something you would like to digitally color using Photoshop. Your drawing needs to be done on white paper (with out lines) and black ink. Use any methods you wish. |
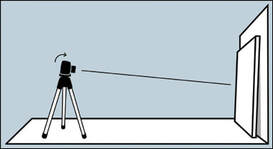
Step TwoTake a photo of your inked drawing under bright light without shadows. Using your phone you can crop and then adjust the Saturation, Contrast, and Brightness. Your goal is to edit your photo to get the black pen lines totally black and the white paper as white as possible. The best method if to tape your paper to the wall, make sure the office lights are on and take a photo so your hands and phone don't cast shadows onto your paper.
|
Step ThreeTransfer your photo to your computer using any method you have available. Upload your image to your Drive and download the image to your computer or use Air Drop. If you need help with taking a photo and uploading it let me know and I can take a photo for you.
|
Step Four: Separating Black Lines from White Paper
|
Create a new photoshop document that is one of the sizes listed above and 300 dpi. Place your photo into this document, scale and rotate your image if you need to.
The first step is to max out the contrast by going to Image-> Adjustments->Brightness Contrast. Slide contrast all the way to the right. Do this step 5 times. Your goal is to get the paper as white as possible while maintaining the blackness of the line work. Now to separate lines ( Starts at 1m 20seconds in the 7m video). Follow these steps: 1- Cmd A- Select All 2- Cmd X- Cut 3- Q -Enter Quick Mask Mode 4- Cmd V- Paste (Lines show up in light red) 5- Q -Exit Quick Mask Mode 6- Shift Cmd I- Invert the selection 7- Edit- Fill and select Black. Do this 2 or 3 times. Label this layer Line Art (do not apply your paint to the line layer). Create another layer and fill it with White. Drag this layer to the bottom. Create More layers and label them with names that connect to your artwork. These layers are where your paint will go. |
|
Step Five: Adding Color to your Artwork
|
You can watch parts or all of the Coloring/ Shading a Drawing in Photoshop -Tutorial video.
Essentially you will use the magic wand to make a selection on your line art layer. You can use shift and click to select multiple closed areas. One setting you want to check at the top of your screen is Contiguous if it is unchecked. Once you make a selection you can expand your selection by a few pixels by choosing Select>Modify>Expand. Set 3 or 5 pixels. This will allow your paint to fill the shape without leaving a halo edge between the color and your black lines. Create a new layer and use the paint bucket to fill the shape with a color. I highly recommend separating your different colors into different layers and label them as you go. Ten Hundred goes through his whole drawing and fills everything with solid colors first. You could also paste images onto layers if you would like to fill some of your shapes with pictures instead. Once your shapes are filled with solid colors you can then easily go into each layer and paint on top with darker or lighter versions of the same color to create highlights and shadows. You can also use various textured brushes, adjust the hardness of your brush so your highlights and shadows fade out. You can also adjust the opacity of your brush instead of painting with opaque paint. |
|


