Stage 3: Enhancing EyesThis page will walk you through the steps to enhance the eyes on your project..
The objective of this process is to enhance the eyes by using some of the technques and tools you have learned from the prior lessons. This step is explained in the video to the right. You can also find a folder of videos on the ghsmacserver- Graphic/Resources/PhotoRetouching/ Enhancing Eyes This tutorial is credited to Frank Hatcher. Thank you for sharing your knowledge and techiniques. |
|
Enhance the Eyes
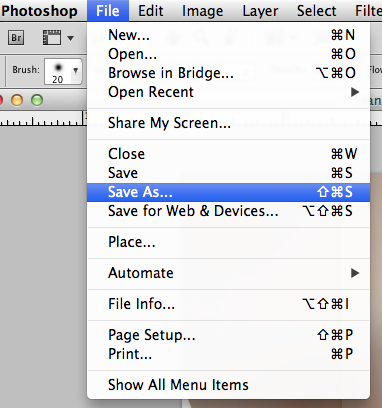
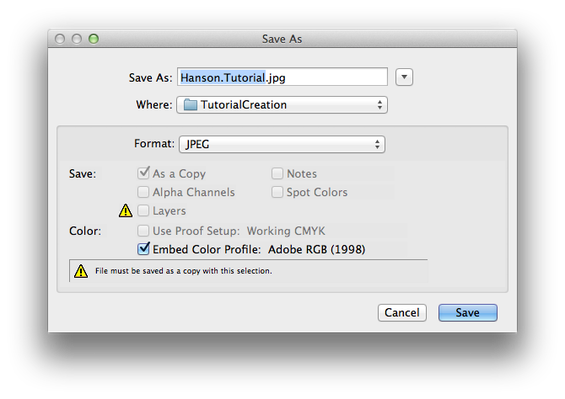
1. Save a .JPEG from your project.
The Enhancing Eyes stage is taken from a different tutorial. You will You will save a .JPEG from your project to enhance the eyes. By saving a .JPEG copy the project will be compressed into one layer. You will work with the .JPEG to enhance the eyes for this tutorial. Open up your JPEG file to follow this tutorial
|
|
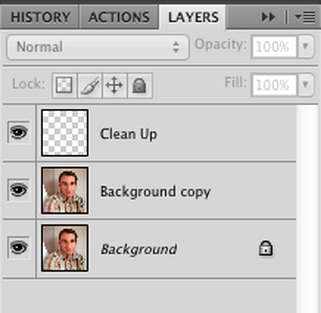
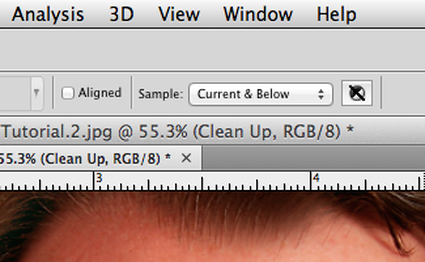
2. Clean up Layer
|
You can watch S3.1Enhancing EyesPart1.mov to learn how to accomplish these steps.
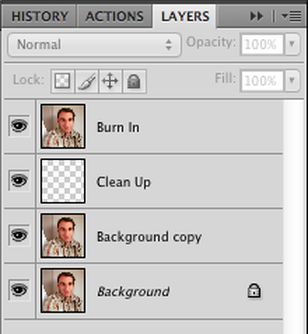
Create a duplicate of the background image. Create a new layer that says Clean up. You will apply your changes to this new layer. You will have two layers of your image below the clean up layer. You can make corrections if needed on this clean up layer. Use the spot healing brush tool and set the tool to "Current and Below." This will allow you to place your changes onto a layer above your image. |
|
|
Use the spot healing brush tool and set the tool to "Current and Below." This will allow you to place your changes onto a layer above your image. You will work on the Clean up layer.
Hold down option key to sample an area you wish to clone. Then paint with the healing brush tool to clean up red veins, makeup, contacts, or other parts of your eyes you want to clean up. 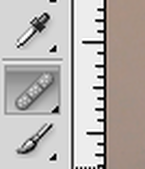
|
|
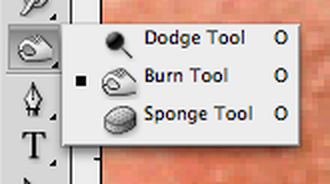
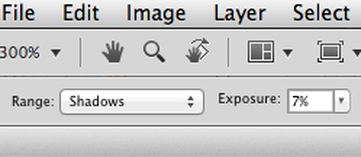
3. Burn In Dark Areas
|
You can watch S3.2Enhancing EyesPart2.mov to learn how to accomplish these steps.
You can merge these layers together and copy them by pressing and holding Shift, Option, Command and E. This will create a new layer at the top of the layers you have merged into one image. Title this new layer "Burn In." This is the layer you can use to burn in the edges of your iris. Use the Burn Tool with the Range set to: Shadows and Exposure set to: 5-7%. Use this tool around the edges of your iris to darken the edges. If you have dark eyes you may not need to do this step. You can adjust the opacity of the Burn In layer to tone down the amount of burning you have created on your iris. You will want to treat both of your eyes equally. |
|
|
|
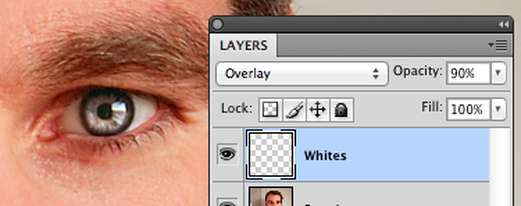
4. Punch Up Light Areas
You can watch S3.3Enhancing EyesPart3.mov to learn how to accomplish these steps.
Create a layer called Whites. Use a soft paint brush paint a semi-circle of white on the lower part your iris but not your pupil area. Change the blending mode of this layer to Overlay instead of Normal in the layers panel. Adjust the opacity of this layer to change the intensity of your eyes. You might adjust it so you don't look like a vampire. |
|
5. Saturate Color
|
You can watch S3.4Enhancing EyesPart4.mov to learn how to accomplish these steps.
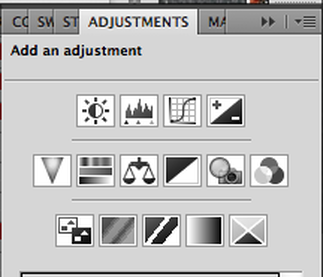
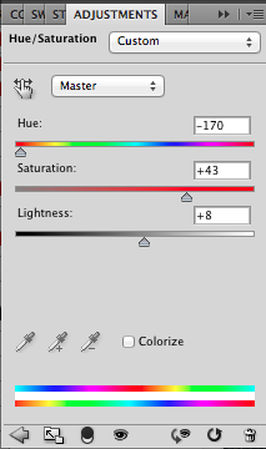
In the Adjustments Panel click on the hue/saturation icon. Set the saturation to about 40% until you get a desired color enhancement in your eyes. This will adjust the saturation of the entire image. You want to saturate only the iris part fo your eyes. Choose Edit-> Fill and then choose Black. This will create a black Layer Mask on the saturation layer. This action will hide the entire saturation layer. Using a brush and white paint you will paint in the areas you want to have a saturated color. Paint in your eyes to reveal a saturated iris. You can also adjust the color of your eyes if you play with the hue slider. 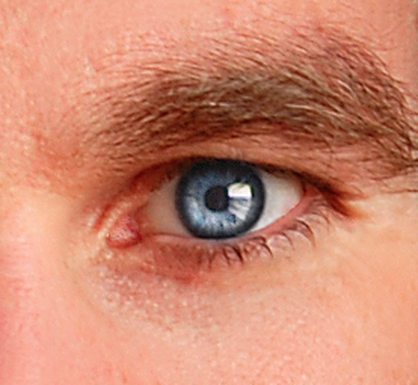
|
|
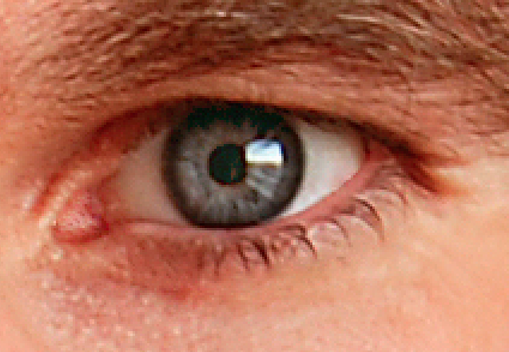
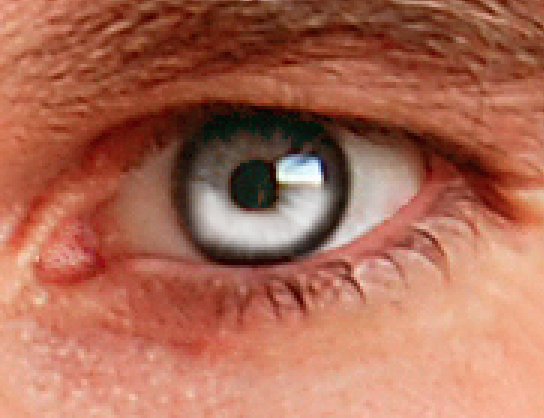
The Before and After Eye Enhancement

|

|
4. Save your work.
Compare your Before Layer to the work you have completed. By clicking this layer on and off you may see areas you might want to continue working on.
Save your project.
Save your project.
