Stage 2: Skin RetouchingThis page will walk you through the steps to Lighten and Darken areas of your portrait that need it. If you have dark shadows that need to be lightened or light areas that need to be darkened you can do it all with the Dodge and Burn Tools.
The objective of this process is to manually adjust the exposure of certain parts of your portrait. This step is explained in the video to the right at 7m35s-10m48s. You can also find this video on the ghsmacserver- Graphic/Resources/PhotoRetouching/ S2.SkinRetouching |
|
Burn and Dodge to Darken and Lighten
1. Create Burn and Dodge Layers
Create a new Layer from the Layer Menu Option....or hold Option while you click the new layer button in the layers panel.
This will allow you to make some settings to this layer before you begin.
This will allow you to make some settings to this layer before you begin.
2. Set up the New Layer
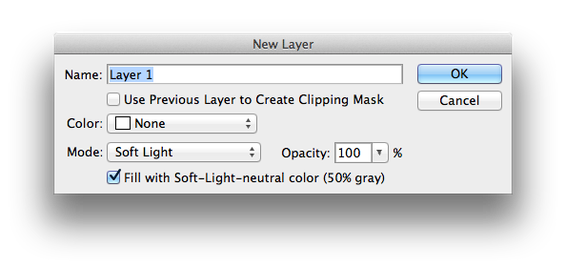
In the New Layer box you will set the Mode to Soft Light and put a check in the box next to "Fill with Soft-Light-neutral color (50% gray).
Once you have this set click OK.
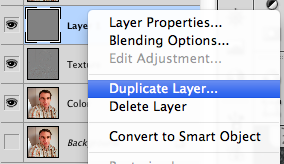
In your Layer Panel you will right click on the New Layer and select Duplicate Layer. Rename the two new layers Dodge and Burn.
You can arrange your layers as shown in the images below.
Once you have this set click OK.
In your Layer Panel you will right click on the New Layer and select Duplicate Layer. Rename the two new layers Dodge and Burn.
You can arrange your layers as shown in the images below.
Duplicate the New Layer
|
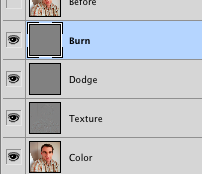
Rename the new layers "Burn" and "Dodge"
|
3. Burn Blackens....Dodge Lightens
Use the Burn and Dodge Tools to add areas of lightness and darkness to your portrait. If you can remember the BURN tool BLACKENS it might help you to determine which tool does what. It helps me remember.
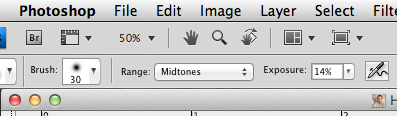
When you use both of these tools you will set the Range to Midtones and Exposure to 12% in the Tool Options area. See the image to the right to see where these tool options are located.
You will select the Burn Layer when you use the Burn Tool and select the Dodge Layer when you use the Dodge Tool.
Read about the tools below and where you can and should use these tools.
Dodge Tool (O)
The Dodge Tool will turn portions of your image lighter as you paint over an area. Before using this tool set the Range to Midtones and Exposure to 12%. You will also want to change your brush size to fit the areas you are burning with the [ and ] keys. Also using a soft brush will help blend in your strokes.
If you want to make a specific area lighter (such as your teeth or eyes) you can make a selection of the area you want to lighten before using the Dodge Tool. What needs to be dodged or made lighter?
|
Burn Tool (O)
The Burn Tool will turn portions of your image darker as you paint over an area. Before using this tool set the Range to Midtones and Exposure to 12%. You will also want to change your brush size to fit the areas you are burning with the [ and ] keys. Also using a soft brush will help blend in your strokes.
What needs to be burned or made darker?
|
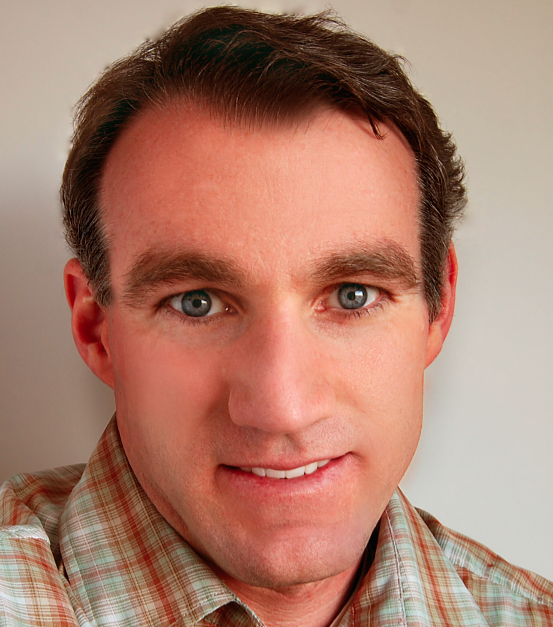
The Before and After for Burning and Dodging
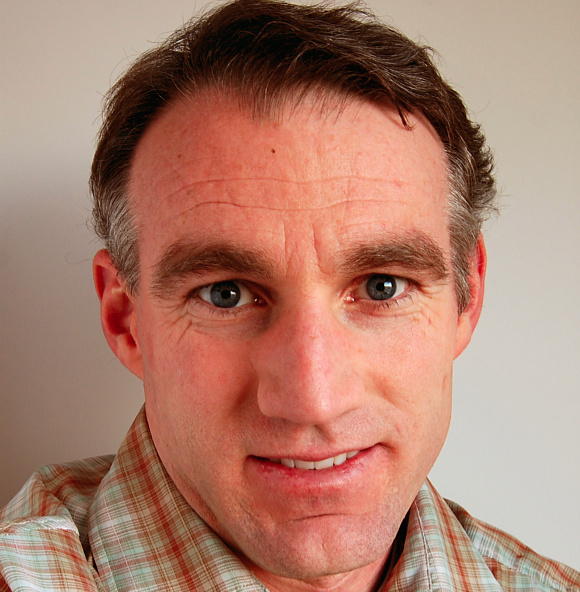
Old Mr. Hanson
|
Mr. Hanson after some Burning and Dodging
|
4. Save your work and move on...
Compare your Before Layer to the work you have completed. By clicking this layer on and off you may see areas you might want to continue working on.
Save your project.
You are now setup and ready to move onto the next step: Make Up.
Save your project.
You are now setup and ready to move onto the next step: Make Up.
