Photo Retouching Stage 1: Color CorrectingThis page will walk you through the steps involved in making some color enhancements.
These adjustments can be made to any photo and will quickly and easily enhance a photo. This technique is outlined in detail in the YouTube video embedded to the right. You can also find this video on the ghsmacserver- Graphic/Resources/PhotoRetouching/ S1.ColorCorrection |
|
Color Enhancement
1. Switch to Lab Color
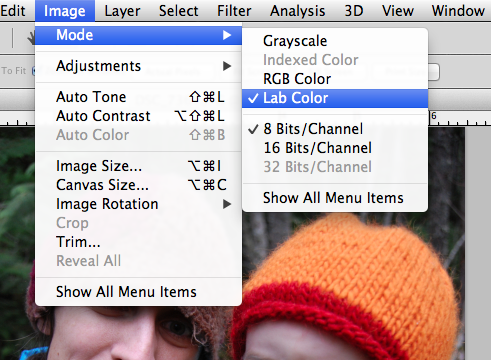
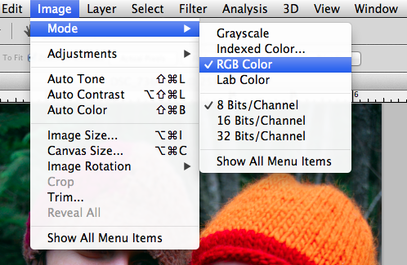
First you will change the color mode to enhance the color. Open a copy of your original image with Adobe Photoshop. Convert the document to Lab Color from RGB. This is under Image->Mode->Lab Color
2. Open the Curves Adjustment Box
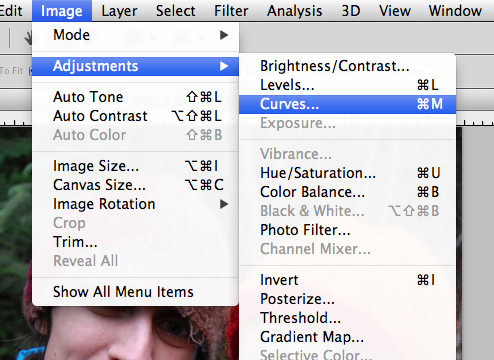
You will adjust the A and B channels in Curves. To get to this adjustment select Image->Adjustments->Curves.
3. Adjust the A Channel (Repeat this step for the B Channel)
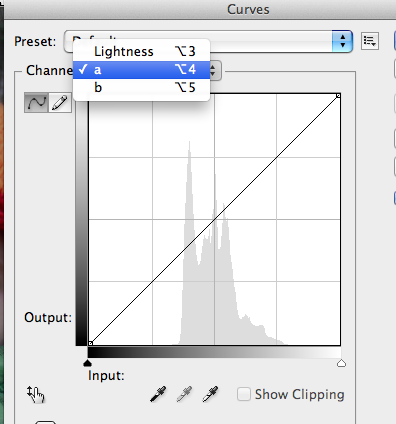
You will drag both the A and B channels. Change the Channel from Lightness to A and make an adjustment. Then repeat Step 2 and 3 to adjust the B Channel. Your goal is to enhance the color in your image to produce a more saturated colorful photo.
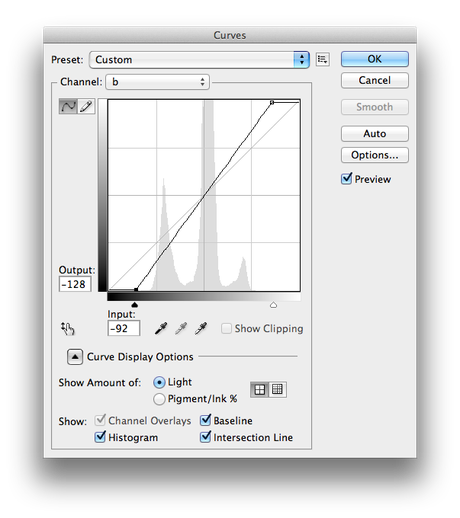
4. Enhance the A Channel (Repeat process for B Channel)
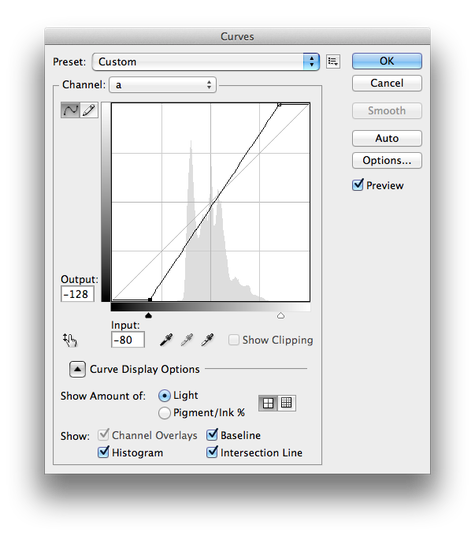
You will drag the top right handle toward the center but keep it along the top edge. Drag the bottom left handle also toward the center but keep it along the bottom edge.
Look at your image while you do this step. The objective of this step is to enhance the color in your image. If you drag these handles too far your colors will turn an unnatural color. Keep in mind you are trying to enhance the color found in the original image.
After your adjustment is made click OK. You will perform this step for both A and B Channels.
5. Adjust the B Channel (In case you forgot)
Repeat the step above for the B Channel
Return to RGB Color Mode
Return to RGB Color mode by going to Image->Mode->RGB Color. Save your work. Your image now has enhanced color.
Save your project.
Move on to the next step: Sharpen Image
Save your project.
Move on to the next step: Sharpen Image
