Stage 2: Skin RetouchingThis page will walk you through the steps involved in setting the black and white point in your image. This will help correct the exposure range that is visible in your image.
These adjustments can be made to any photo and will quickly and easily enhance a photo. This step is explained in the video to the right at 0.20s-1m25s. You can also find this video on the ghsmacserver- Graphic/Resources/PhotoRetouching/ S2.SkinRetouching |
|
Set Up Your Layers
1. Open your project and the Layers Panel
Open up the Layers Panel and create three new duplicates of your background image. Choose Window->Layers.
Right click on the background layer and select Duplicate Layer, do this three times. As you create your layers name them Before, Texture, Color and Background.
Right click on the background layer and select Duplicate Layer, do this three times. As you create your layers name them Before, Texture, Color and Background.
2. Organize your Layers
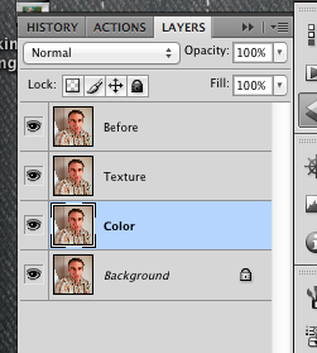
Arrange your layers in this order and use the same layer names. You can turn the Before Layer off as you work. You can turn it on to see how your images looked before your edits. You will not make any changes to the Before layer, it is there for you to see your progress.
3. Apply Blur to Color Layer
You will apply a Blur to the Color Layer. Turn the layers above the Color Layer off so you can see the preview. Your goal is to blur the layer until the colors begin to blend together.
Select the Color Layer, choose Filter->Blur-> Gaussian Blur.
Select the Color Layer, choose Filter->Blur-> Gaussian Blur.
4. Blur until colors blend together.
I used about a 5 pixel radius for my image. You want to choose a blur level so the skin tones begin to blend together. Your preview image should appear fuzzy.
5. Set up the Texture Layer
You will set up the Texture Layer next. Select the Texture Layer in the layers panel.
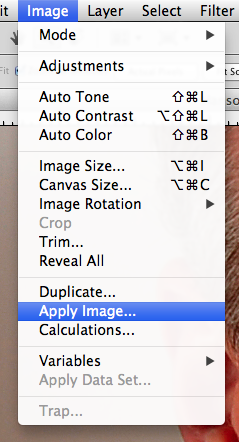
Choose Image-> Apply Image
Enter the values in the step below.
Choose Image-> Apply Image
Enter the values in the step below.
6. Enter Apply Image Values
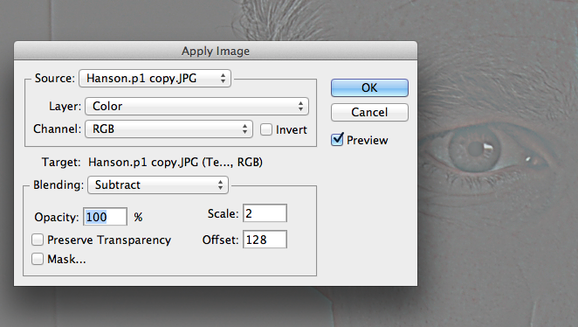
When you see the Apply Image Dialogue Box you will set the settings the same as the image at the right. Enter the numbers and settings to your Apply Image window:
Layer: Choose ->Color
Blending: Subtract
Opacity: 100%
Scale: 2
Offset: 128
Your Texture Layer should appear gray and sort of rainbow like. You can see the result to the right.
Click OK after this is done.
Layer: Choose ->Color
Blending: Subtract
Opacity: 100%
Scale: 2
Offset: 128
Your Texture Layer should appear gray and sort of rainbow like. You can see the result to the right.
Click OK after this is done.
7. Change Blending Mode of Texture Layer
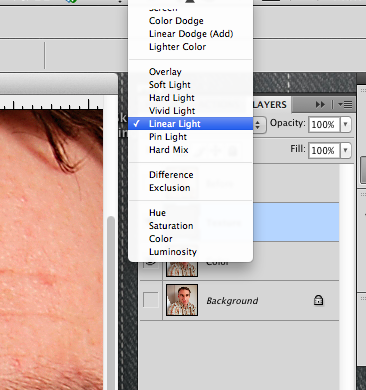
Select the Texture Layer in the Layers Panel. Change the Blending Mode from Normal to Linear Light.
Save your project.
You are now setup and ready to move onto the next step: Smoothing out Skin Tones on the Color Layer.
Save your project.
You are now setup and ready to move onto the next step: Smoothing out Skin Tones on the Color Layer.
