Art Survey Digital Project: The Text Based Portrait
This project will allow Art Survey Students to explore the world of working with digital images, typography, color and Photoshop CS6. This page will allow you to work at your own pace and review parts of the lecture that you missed in class.
You will use a photo of yourself to create a typography based image. The words of you choose will reflect you, your personality, interests, or state of mind.
You can also follow this tutorial for help also.
You will use a photo of yourself to create a typography based image. The words of you choose will reflect you, your personality, interests, or state of mind.
You can also follow this tutorial for help also.
100 Text Based Portrait Example and Tutorials
Stage 1: Open File in Photoshop, Set up Layers, Delete Background, Fill with White.
Drag your image to your desktop from Photobooth or from your Downloads folder.
Open your image with photoshop by one of the following methods:
Open your image with photoshop by one of the following methods:
- Right click on your image and choose Open With->Photoshop
- Start Photoshop and then choose Open and then navigate to your file.
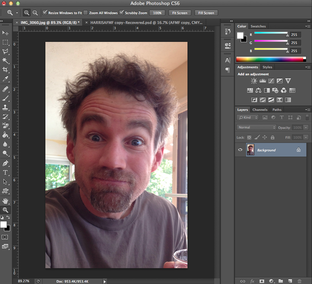
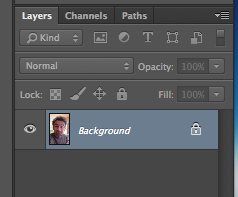
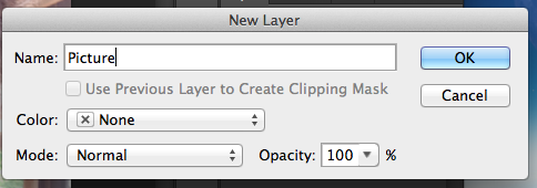
When you first open your picture you should see the Layers Panel at the bottom right corner of your screen. There will be one layer titled "Background" Double click on the word background to turn this into a Layer. Give this new layer a title such as "Picture."
If you would like to crop your picture you can use the Crop Tool.
If you would like to crop your picture you can use the Crop Tool.
|
|
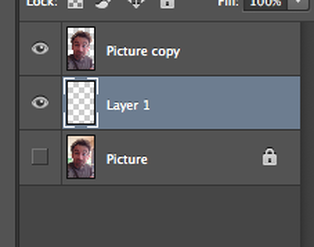
Duplicate the Picture layer you just made by right clicking on the layer and selecting "Duplicate Layer." You can hide layers by clicking the Eyeball Icon on or off. You can also lock layers by clicking on a layer and then clicking on the Lock Icon at the top of the Layers panel. Lock and hide the bottom layer.
Create a new layer by clicking on the New Layer Icon at the bottom of the Layers Panel. Drag this new layer between your locked picture layer and the copy.
Create a new layer by clicking on the New Layer Icon at the bottom of the Layers Panel. Drag this new layer between your locked picture layer and the copy.
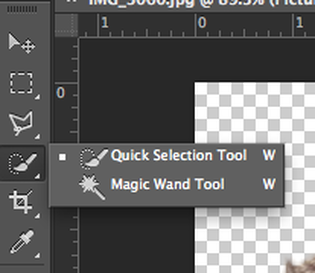
Use the Quick Selection Tool to delete the background around your head. Select the top layer that contains your image. Find the Quick Selection Tool in the Tool Panel on the left side of your screen. You will need to hold down on the Magic Wand Tool to reveal the Quick Selection Tool if it is not visible.
Click and drag a small amount to make a selection. Press delete on your keyboard to delete the selected area. Continue to delete small areas with out deleting parts of your face, clothes, or hair. If you select an area that is too large press Command-D to deselect. Delete the entire background.
To Deselect a selection press Command-D
If you make an error you can UNDO by pressing Command-Z.
Undo several errors by pressing Option-Command-Z
If you don't see any change when you delete make sure that your bottom layer is turned off.
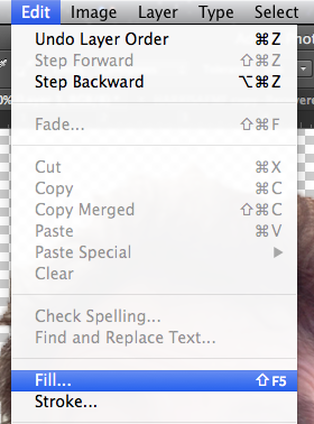
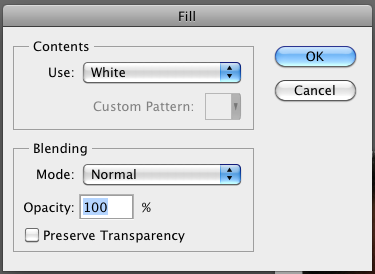
Fill the empty Layer with solid white. Select the blank layer in your Layers Panel. Select Edit-> Fill. Choose White. Click OK.
|
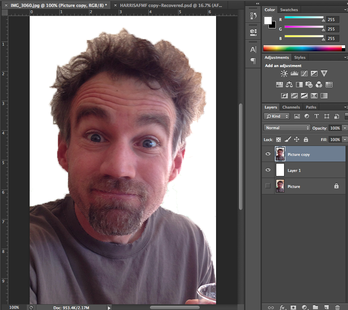
Your project should look like this after you have successfully completed these steps!
