Portrait RetouchingThis project will allow you to see how models pictured in magzines, advertizements and movie posters are significantly edited after they are photographed. There is a tremendous amount of photoshop work that goes into each and every portrait you see published. By working with your own photo you will get a better understanding of how much retouching goes into a portrait. Hopefully you will also realize that beauty portrayed by the media is created by technology.
You will work with an image of yourself and "glamorize" your portrait to learn the process of editing photos. This process will show you how to make color corrections and enhancements, sharpen, edit imperfections, use burn and dodge to correct for exposure. This will be a multi-step process to edit one image and you can use the pages below to help guide you through the process if you are unable to follow along in class. Project Specifications: Size: 8x10 or 8x12 Color Format: RGB Programs: Photoshop and Illustrator Files to Submit: .AI or .PSD, .JPG if you would like to have your project printed. The Objectives:Project Requirements:
-Show evidence that you can follow the various skills outlined in the tutorials in Stage 1, 2, and 3. -Produce a portrait that demonstrates your ability to retouch a portrait photo. Technical Skills (Current Objective): These skills are outlined in the Process Stage 1, 2, and 3 (See links to several pages below) Design Concepts and Techniques (Elements and Principles of Design): Apply your skills with using Adobe Illustrator to layout text and incorporate an image with Stage 4. |
The Process:
Stage 1: Color Correction, Sharpen, Set White and Black PointsIn this step you will learn to make some simple adjustments to the photo you will work with. This process can be done to any photo to enhance the color and sharpness of a photo.
Click on the links below to learn this process: This process is explained in detail on this YouTube video by DigitalAssisin |
Stage 2: Skin RetouchingThis process is explained in detail on this YouTube video by Sara Kiesling
In this stage you will smooth out your skin tone, clean up blemishes, stray hairs, wrinkles, shadows, etc. Click on the links below to learn how to do this:
|
Stage 3: Enhancing the EyesThis process is explained in detail on this YouTube video by Frank Hatcher
In this step you will save your existing project as a .Jpeg copy. This will preserve your work on to one layer and you can begin to enhance the eyes. Enhancing the Eyes Tutorial |
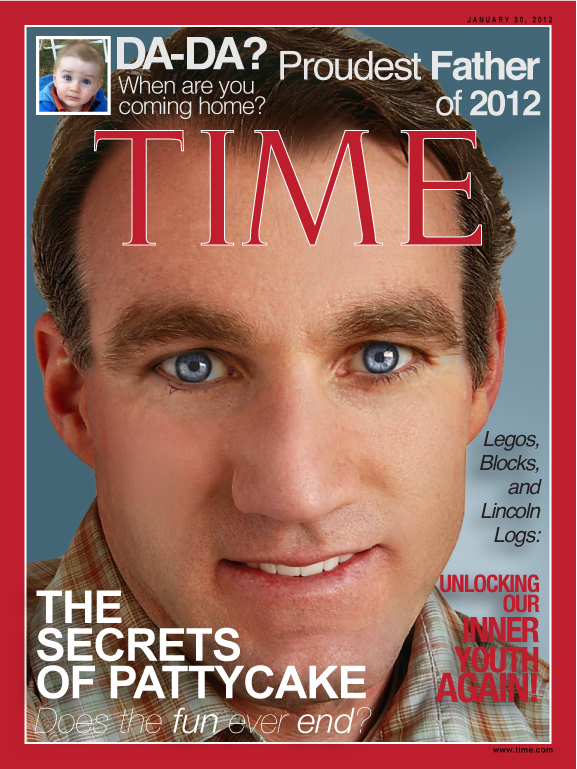
STAGE 4: Make yourself FAMOUS!Now that you have your portrait looking very much like a hollywood star or model you can place your image onto a magazine. You will create a magazine cover layout that is similar to a magazine you would like to be featured on.
Put your skills and knowledge of Adobe Illustrator and Photoshop to use. Use Adobe Illustrator to design the cover of your magazine. Create an Adobe Illustrator file that is the same size as the magazine you are trying to replicate. You can import an image of the magazine and scale it up to the actual size by holding shift when you scale the image. Use the magazine image as a template or model to replicate your own version of the magazine. A typical magazine is 8.5x10". You might search Google to find the actual dimensions of your magazine. Search for similar font styles to match the ones used on the cover of your magazine. Search google to find a similar free font. Try these resources to help find or identify fonts: You can create various titles for articles that can be found inside your magazine. If you don't know the titles of these articles, make them up. Create the image you will use for your magazine cover in Photoshop. You will save a .jpg of your retouched portrait. Create a new Photoshop document that is the same dimensions of your magazine. You can insert a new background or make additional adjustments to your image that is fitting for the cover of your magazine. Magazine Requirements:
|
|
